对前三次完成的项目,做进一步的优化改进。
# 依赖注入
提到依赖注入,就不得不提到 IoC。
IoC 是 Inversion of Control 的缩写,称为控制反转。它是面向对象编程中的一种设计原则,主要用来降低代码之间的耦合度,使程序模块化,易于扩展。IoC 意味着将依赖模块和被依赖模块都交给容器去管理,当我们使用模块时,由容器动态的将它的依赖关系注入到模块中去。
实现 IoC 最常见的方式就是依赖注入(Dependency Injection,简称 DI)。
前端中的 IoC 最早是由 Angular 引进来的。在此之前,IoC 最常用于 Java 的 Spring (opens new window) 框架中。
在之前的项目中,我们在用到某个 controller 时,就需要手动将它导入,然后再 new 生成一个实例。这种方式太麻烦了,我们希望达到的结果是,某个 controller 里面需要用到某个服务的时候,能够自动注入。
下面就开始调整代码。
- 首先,删掉 server/controllers 文件夹下的 index.js 和 Controller.js,并相应的删掉另外两个 controller 文件中的导入相关的语句。
// IndexController.js
class IndexController {
  constructor() {}
  async actionIndex(ctx, next) {
    ctx.body = "首页";
  }
}

export default IndexController;

// BooksController.js
class BooksController {
  constructor() {}
  async actionIndex(ctx, next) {
    ctx.body = await ctx.render("books/pages/list");
  }
  async actionCreate(ctx, next) {
    ctx.body = await ctx.render("books/pages/create");
  }
}
export default BooksController;
2
3
4
5
6
7
8
9
10
11
12
13
14
15
16
17
18
19
20
21
然后,把 models 文件夹重命名为 services,相当于服务的提供方。
其次,删掉启动文件 app.js 中与路由相关的代码。
import controllers from "./controllers";

controllers(app);
2
3
# Awilix
Awilix (opens new window) 是一个使用 TypeScript 编写的 JavaScript / Node 极其强大的依赖注入(DI)容器。
除此之外,还有一个专门给 koa 使用的:awilix-koa (opens new window)。
- 在 app.js 中加入以下代码,将所有的路由引进来。
import { loadControllers } from "awilix-koa";
app.use(loadControllers(`${__dirname}/controllers/*.js`));
2
- 在 BooksController 和 IndexController 中创建路由。
// BooksController.js
import { route, GET } from "awilix-koa";

@route("/books")
class BooksController {
  constructor() {}
  @route("/list")
  @GET()
  async actionIndex(ctx, next) {
    ctx.body = await ctx.render("books/pages/list");
  }
  @route("/create")
  @GET()
  async actionCreate(ctx, next) {
    ctx.body = await ctx.render("books/pages/create");
  }
}
export default BooksController;
2
3
4
5
6
7
8
9
10
11
12
13
14
15
16
17
18
// IndexController.js
import { route, GET } from "awilix-koa";

@route("/")
class IndexController {
  constructor() {}
  @route("/")
  @GET()
  async actionIndex(ctx, next) {
    ctx.body = "首页";
  }
}

export default IndexController;
2
3
4
5
6
7
8
9
10
11
12
13
14
- 模拟假数据,并获取数据
将 services 文件夹下的 Book.js 重命名为 BooksService.js,并修改如下。
// import { get } from 'axios';

class BooksService {
  getData() {
    // return get('http://localhost:8080/index.php?r=books');
    return Promise.resolve("数据请求成功");
  }
}

export default BooksService;
2
3
4
5
6
7
8
9
10
然后在 BooksController 中获取数据。
import { route, GET } from "awilix-koa";

@route("/books")
class BooksController {
  constructor({ booksService }) {
    this.booksService = booksService;
  }
  @route("/list")
  @GET()
  async actionIndex(ctx, next) {
    const data = await this.booksService.getData();
    ctx.body = {
      data,
    };
    // ctx.body = await ctx.render('books/pages/list');
  }
  @route("/create")
  @GET()
  async actionCreate(ctx, next) {
    ctx.body = await ctx.render("books/pages/create");
  }
}
export default BooksController;
2
3
4
5
6
7
8
9
10
11
12
13
14
15
16
17
18
19
20
21
22
23
- 在 app.js 中创建容器,并把所有的 services 交给容器管理,再统一注入进来。
import { createContainer, Lifetime } from "awilix";
import { loadControllers, scopePerRequest } from "awilix-koa";

// 创建容器
const container = createContainer();
// 把所有的 services 交给容器管理
container.loadModules([`${__dirname}/services/*.js`], {
  formatName: "camelCase",
  resolverOptions: {
    lifetime: Lifetime.SCOPED,
  },
});
// 终极注入
app.use(scopePerRequest(container));
2
3
4
5
6
7
8
9
10
11
12
13
14
# @babel/plugin-proposal-decorators
- 去 babel (opens new window) 官网找到并安装好这个装饰器的包之后,需要在 gulpfile.js 中的 plugins 进行配置。
["@babel/plugin-proposal-decorators", { "legacy": true }],
然后执行 npm run server:dev 启动服务,同时要把 dist 目录下的文件夹删成只剩下 assets、components 和 views 三个。不这样做的话可能会报错,因为那些文件不是按照现在的方式生成的。再重新启动下服务。
新开一个终端,执行 npm run server:start 启动项目。在浏览器中访问就可以看到效果了。
到此,对路由的依赖注入改造就完成了。
接着,把 views 里的页面也调整下。
首先,把我们获取到的数据在图书列表页中展示出来。
// BooksController.js
async actionIndex(ctx, next) {
    const data = await this.booksService.getData();
    ctx.body = await ctx.render('books/pages/list', {
        data
    });
}
2
3
4
5
6
7
然后,在 list 组件中补充内容
<!-- /components/list/list.html -->
<div class="list">
  <h3>[[data]]</h3>
</div>
2
3
4
再将 list 页面和 create 页面改成引入 list 组件和 create 组件。
<!-- /views/books/pages/list.html -->
<!-- 继承 layout.html -->
{% extends '@layouts/layout.html' %}

{% block title %} 图书列表页 {% endblock %}

{% block head %}
    <!-- injectcss -->
{% endblock %}

{% block content %}
    <h1>展示图书</h1>
    <!-- 引入 list 组件 -->
    {% include "@components/list/list.html" %}
{% endblock %}

{% block script %}
    <!-- injectjs -->
{% endblock %}
2
3
4
5
6
7
8
9
10
11
12
13
14
15
16
17
18
19
<!-- /views/books/pages/create.html -->
<!-- 继承 layout.html -->
{% extends '@layouts/layout.html' %}

{% block title %} 添加图书 {% endblock %}

{% block head %}
    <!-- injectcss -->
{% endblock %}

{% block content %}
    <h1>添加图书</h1>
    <!-- 引入 create 组件 -->
    {% include "@components/create/create.html" %}
{% endblock %}

{% block script %}
    <!-- injectjs -->
{% endblock %}
2
3
4
5
6
7
8
9
10
11
12
13
14
15
16
17
18
19
最后,在 layout.html 中引入 banner 组件,就可以了。
<!DOCTYPE html>
<html lang="en">
  <head>
    <meta charset="UTF-8" />
    <title>{% block title %}{% endblock %}</title>
    {% block head %}{% endblock %}
  </head>
  <body>
    {% include "../../components/banner/banner.html" %}
    <div id="app">
      {% block content %}{% endblock %}
    </div>
    {% block script %}{% endblock %}
  </body>
</html>
2
3
4
5
6
7
8
9
10
11
12
13
14
15
运行 npm run client:dev 重新打包项目,再分别运行 npm run server:dev 和 npm run server:start 启动服务和启动项目。在浏览器中访问就能看到效果了。
# 使用 X-TAG 完成直刷 SSR 和切页 SPA
以上我们完成的多页应用(MPA)有个致命的缺点就是,每次我切换路由的时候,都会重新加载一遍所有的资源。
因此,我们需要解决这个问题,让页面在切换路由的时候不需要重新加载资源。
# jquery.pjax
- 在 layout.html 中引入 pjax。
<!DOCTYPE html>
<html lang="en">
  <head>
    <meta charset="UTF-8" />
    <title>{% block title %}{% endblock %}</title>
    {% block head %}{% endblock %}
  </head>
  <body>
    {% include "../../components/banner/banner.html" %}
    <div id="app">
      {% block content %}{% endblock %}
    </div>
    <script src="https://cdn.staticfile.org/jquery/3.5.1/jquery.js"></script>
    <script src="https://cdn.staticfile.org/jquery.pjax/2.0.1/jquery.pjax.min.js"></script>
    <script>
      $(document).pjax("a", "#app");
    </script>
    {% block script %}{% endblock %}
  </body>
</html>
2
3
4
5
6
7
8
9
10
11
12
13
14
15
16
17
18
19
20
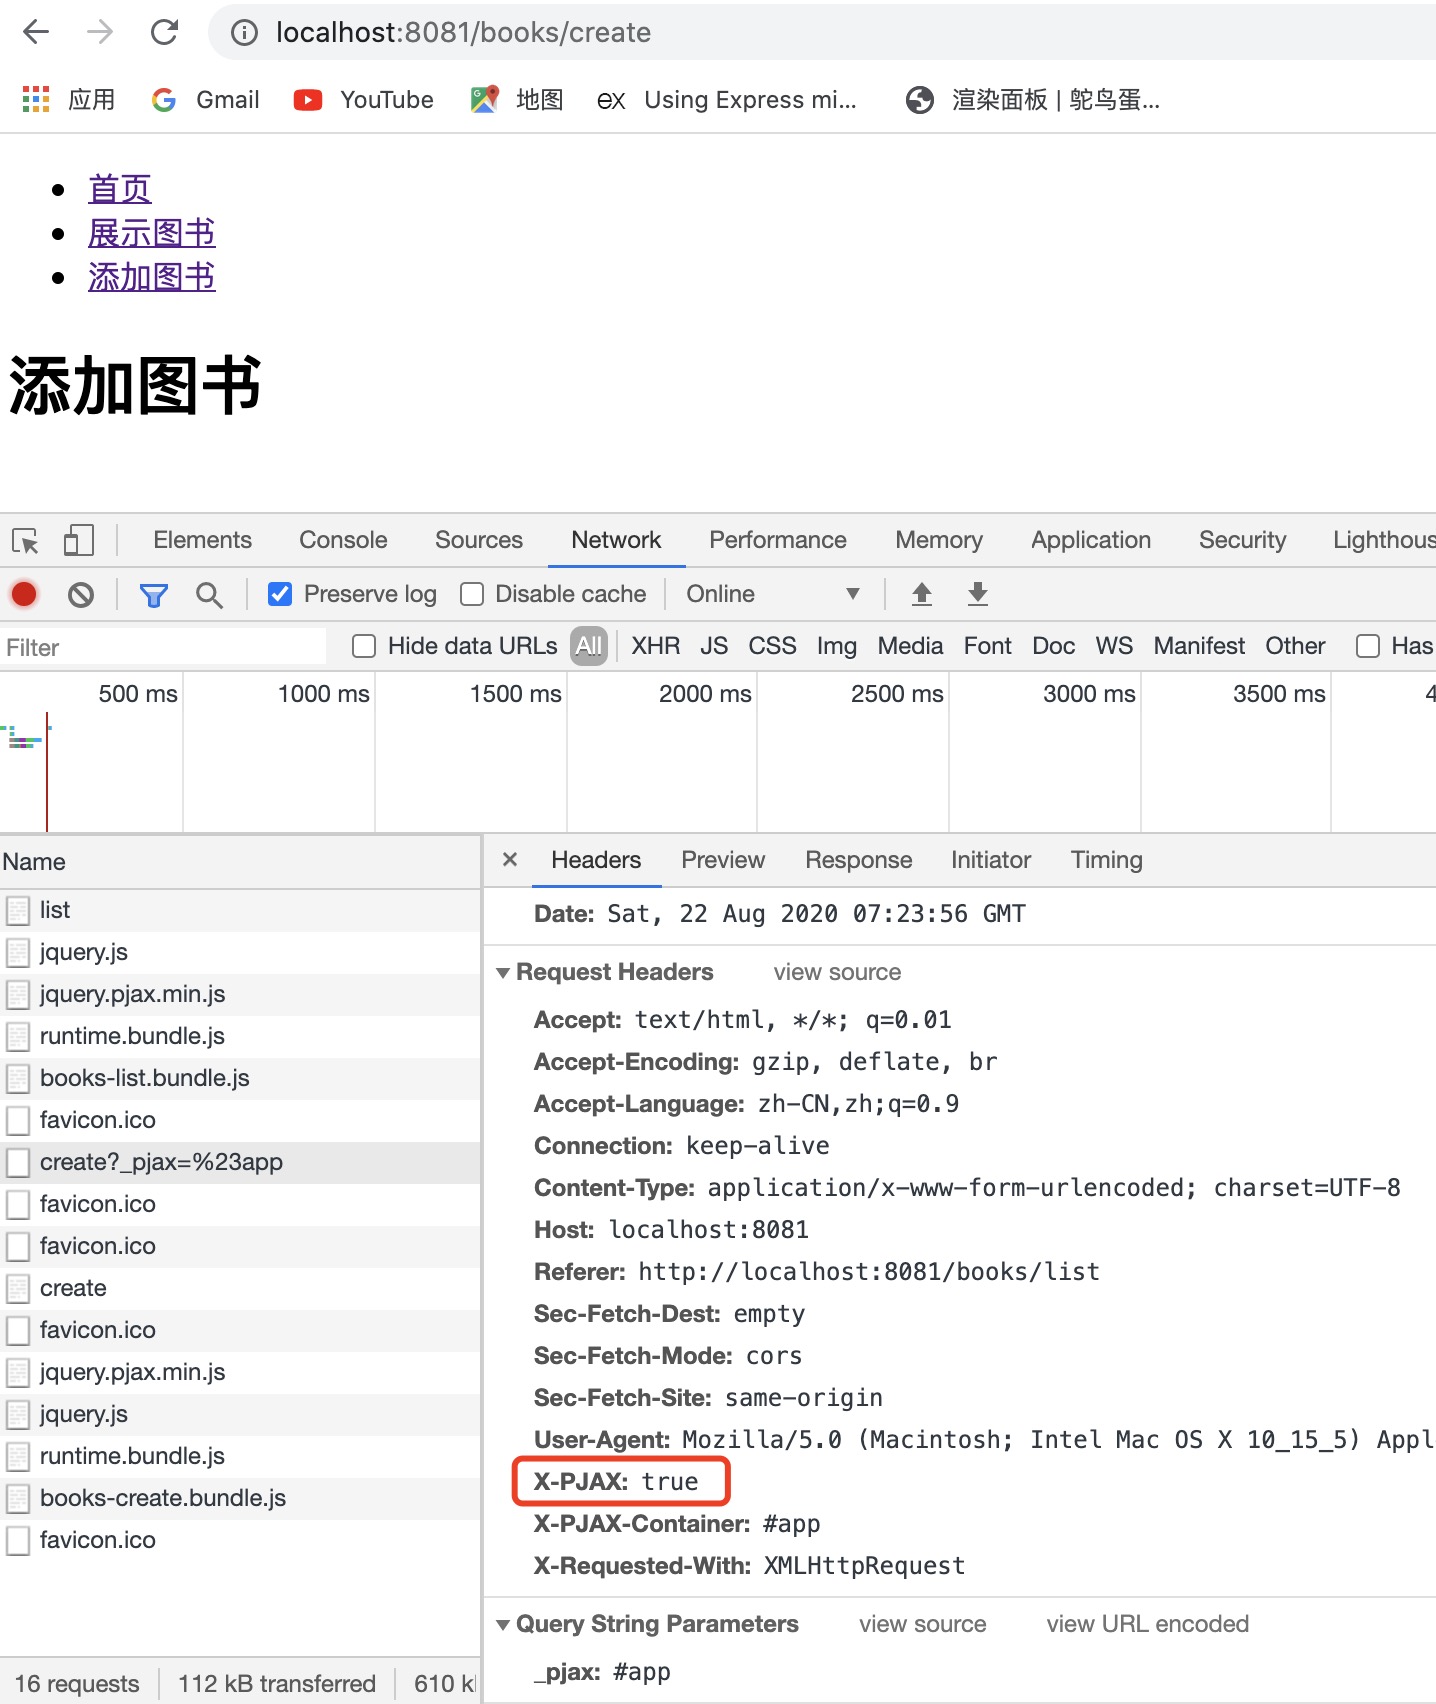
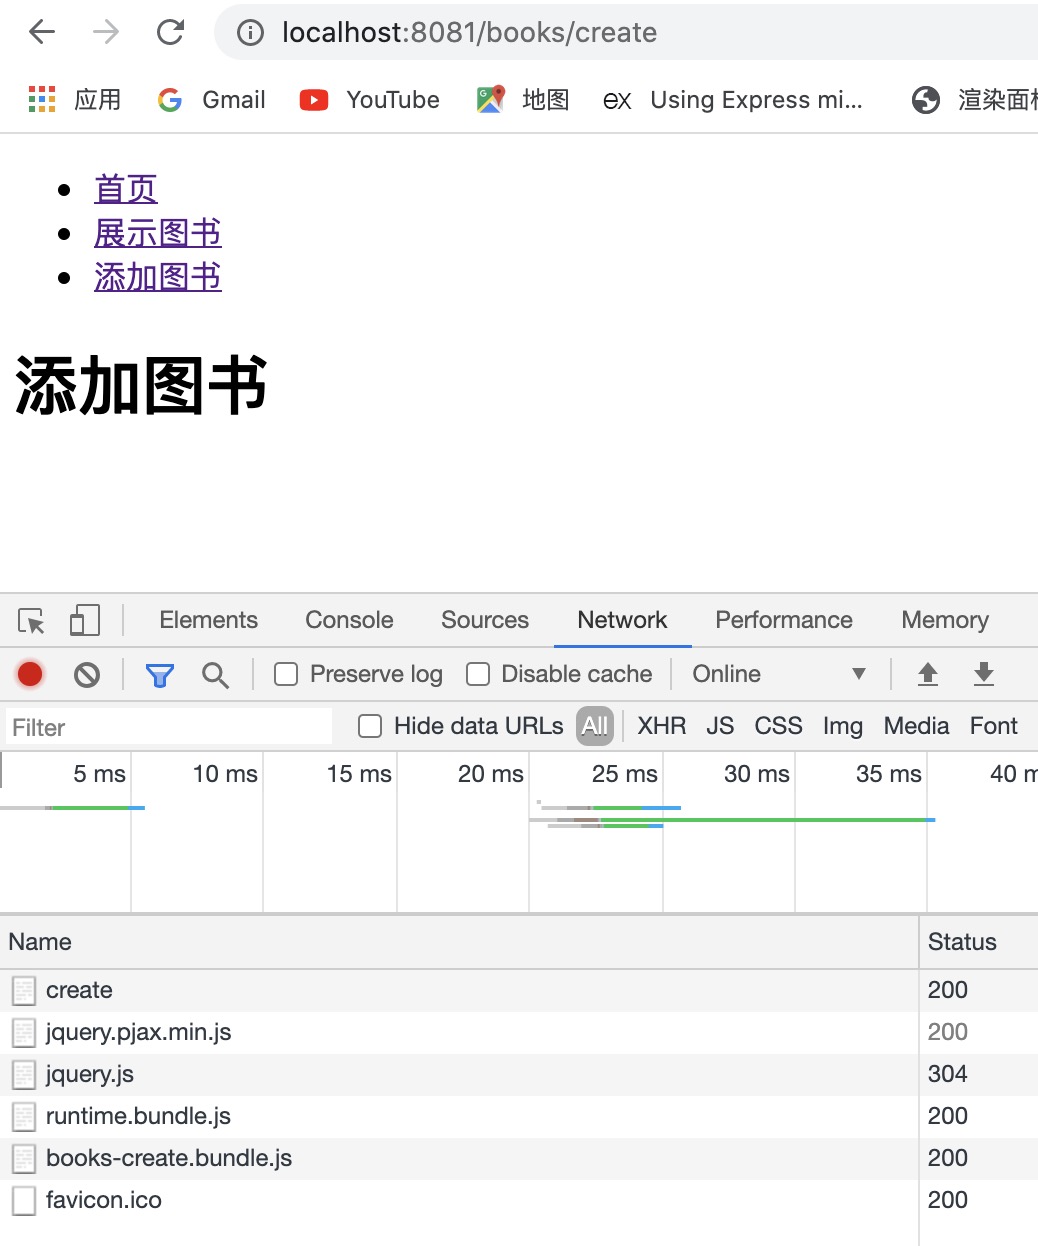
重新打包并运行项目之后,可以看到,当我们从列表页点击跳到新建页的时候,会有这样一个特殊的请求:/books/create?_pjax=%23app,并且它会自动在请求头部那里加上 X-PJAX: true 的标记。
我们就可以根据这个标记来判断,当前页面是站内切的还是直接落地加载的。
比如,可以在 BooksController.js 中加一段代码测试下。
 async actionIndex(ctx, next) {
    if (ctx.request.header['x-pjax']) { // 站内切
        console.log('站内切');
    } else { // 落地页
        console.log('落地页');
    }
    const data = await this.booksService.getData();
    ctx.body = await ctx.render('books/pages/list', {
        data
    });
}
2
3
4
5
6
7
8
9
10
11
当直接访问 http://localhost:8081/books/list 时,会打印出落地页;当从新建页通过点击跳转到列表页时,会先打印出站内切,再输出落地页,之所以会这样,是因为我们没在站内切那里做处理,拦截住,就会继续往下走,如果拦截了就只会输出站内切了。
# 使用 stream 流式传输页面
我们可以让页面是分块传输的,通过使用 stream,这样会比一整个页面整块传输好很多。
在 BooksController.js 中对列表页做下处理。
async actionIndex(ctx, next) {
    const data = await this.booksService.getData();
    const html = await ctx.render('books/pages/list', {
        data
    });
    if (ctx.request.header['x-pjax']) { // 站内切
        console.log('站内切');
    } else { // 落地页
        function createSSRStreamPromise() {
            console.log('落地页');
            return new Promise((resolve, reject) => {
                const htmlStream = new Readable();
                htmlStream.push(html);
                htmlStream.push(null); // 表示已经处理完成了
                ctx.status = 200;
                ctx.type = 'html';
                htmlStream.on('error', (err) => {
                    reject(err);
                }).pipe(ctx.res);
            })
        }
        await createSSRStreamPromise()
    }
    // ctx.body = html;
}
2
3
4
5
6
7
8
9
10
11
12
13
14
15
16
17
18
19
20
21
22
23
24
25
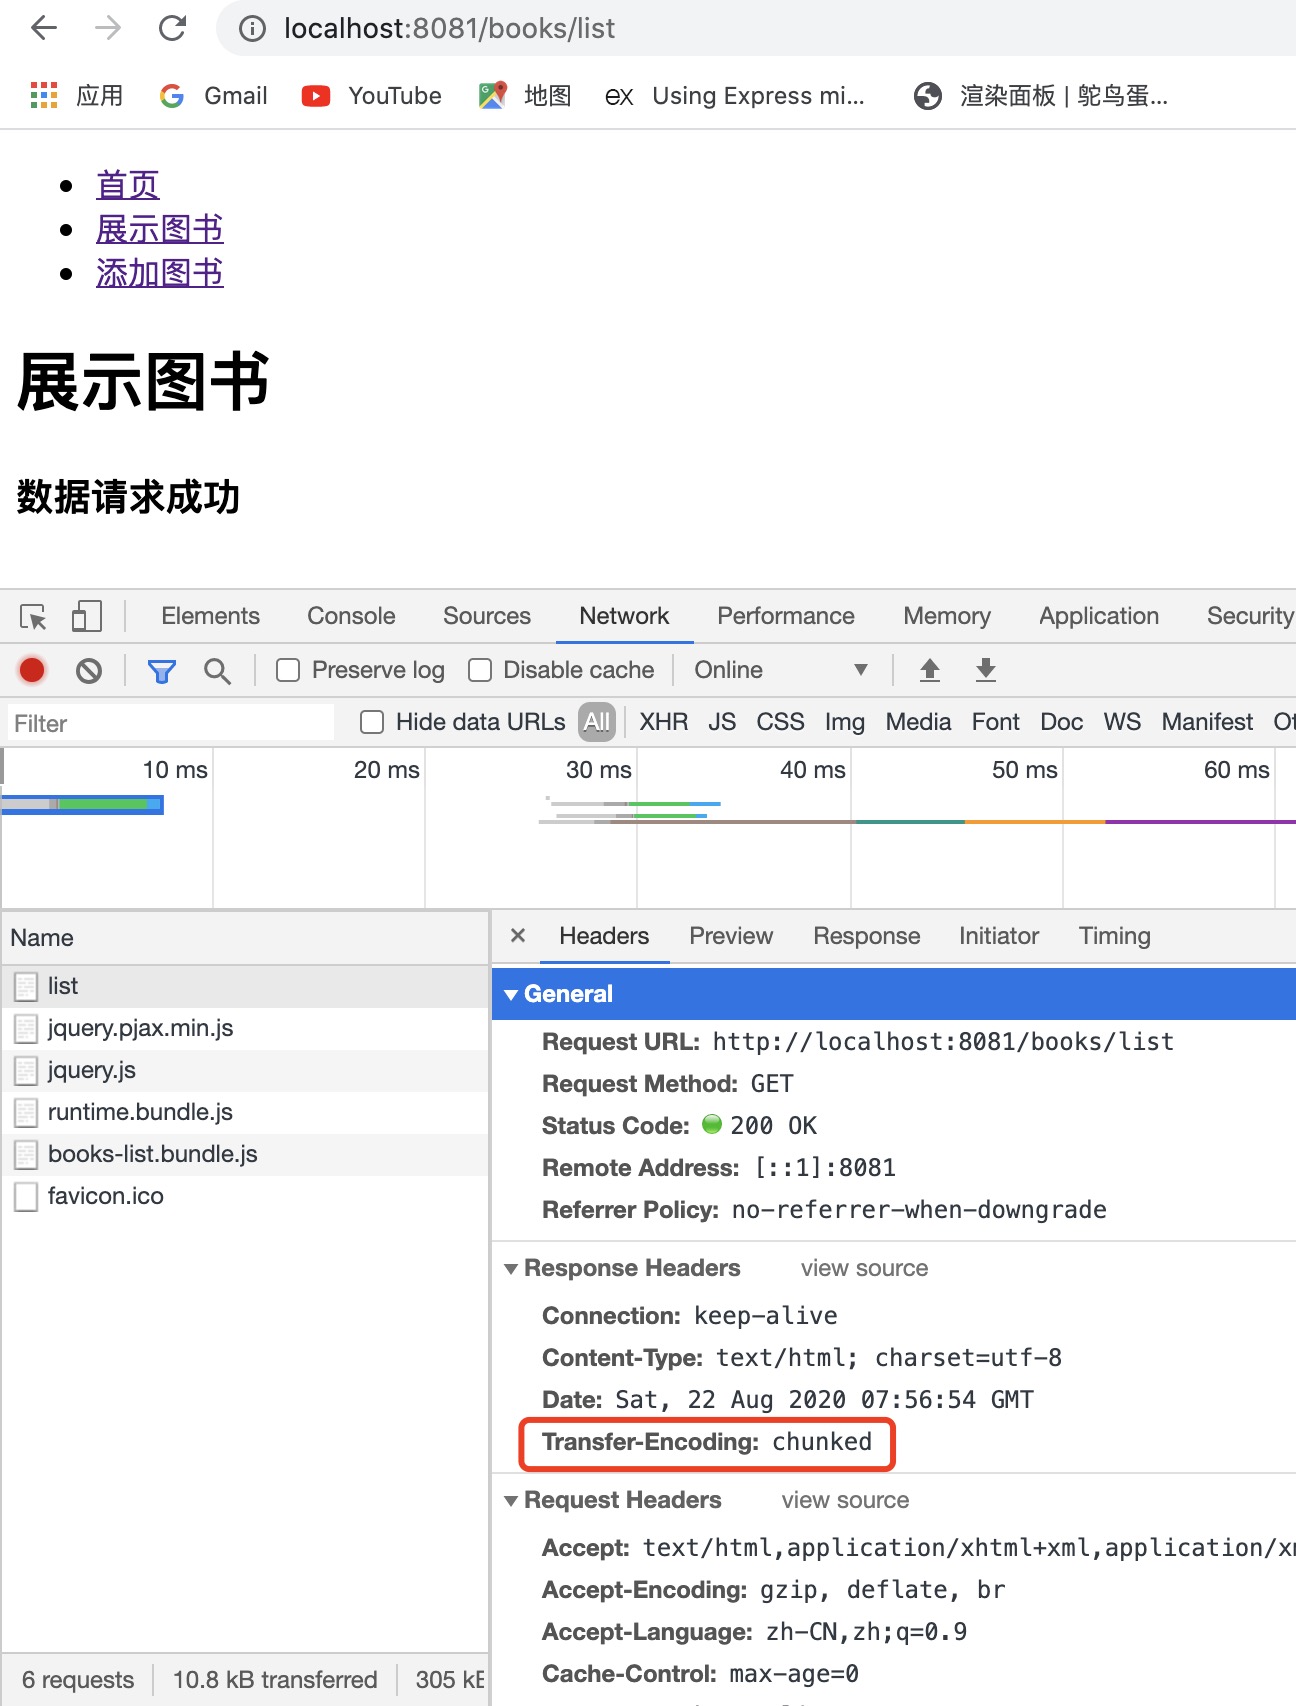
此时,访问 http://localhost:8081/books/list 就可以看到 list 页面请求多了一个 Transfer-Encoding: chunked,表示我们的页面已经成功的采用流式方式进行传输了。
# cheerio
cheerio (opens new window) 是为服务器特别定制的,快速、灵活、实施的 jQuery 核心实现。
在 list 组件中加一个标记 pjaxcontent,有这个标记的 html 就表示是需要拿出来渲染的 html。
<!-- /components/list/list.html -->
<div class="list pjaxcontent">
    <h3>[[data]]</h3>
</div>
2
3
4
在 BooksController.js 中使用 cheerio。
import cheerio from 'cheerio';

async actionIndex(ctx, next) {
    const data = await this.booksService.getData();
    const html = await ctx.render('books/pages/list', {
        data
    });
    if (ctx.request.header['x-pjax']) { // 站内切
        console.log('站内切');
        const $ = cheerio.load(html);
        ctx.status = 200;   // 需要手动修正状态,不然会出现一些奇怪的错误
        ctx.type = 'html';
        // 一块一块的渲染 html
        $('.pjaxcontent').each(function () {
            ctx.res.write($(this).html());
        });
        ctx.res.end();
    } else { // 落地页
        function createSSRStreamPromise() {
            console.log('落地页');
            return new Promise((resolve, reject) => {
                const htmlStream = new Readable();
                htmlStream.push(html);
                htmlStream.push(null); // 表示已经处理完成了
                ctx.status = 200;   // 需要手动修正状态,不然会出现一些奇怪的错误
                ctx.type = 'html';
                htmlStream.on('error', (err) => {
                    reject(err);
                }).pipe(ctx.res);
            })
        }
        await createSSRStreamPromise()
    }
    // ctx.body = html;
}
2
3
4
5
6
7
8
9
10
11
12
13
14
15
16
17
18
19
20
21
22
23
24
25
26
27
28
29
30
31
32
33
34
35
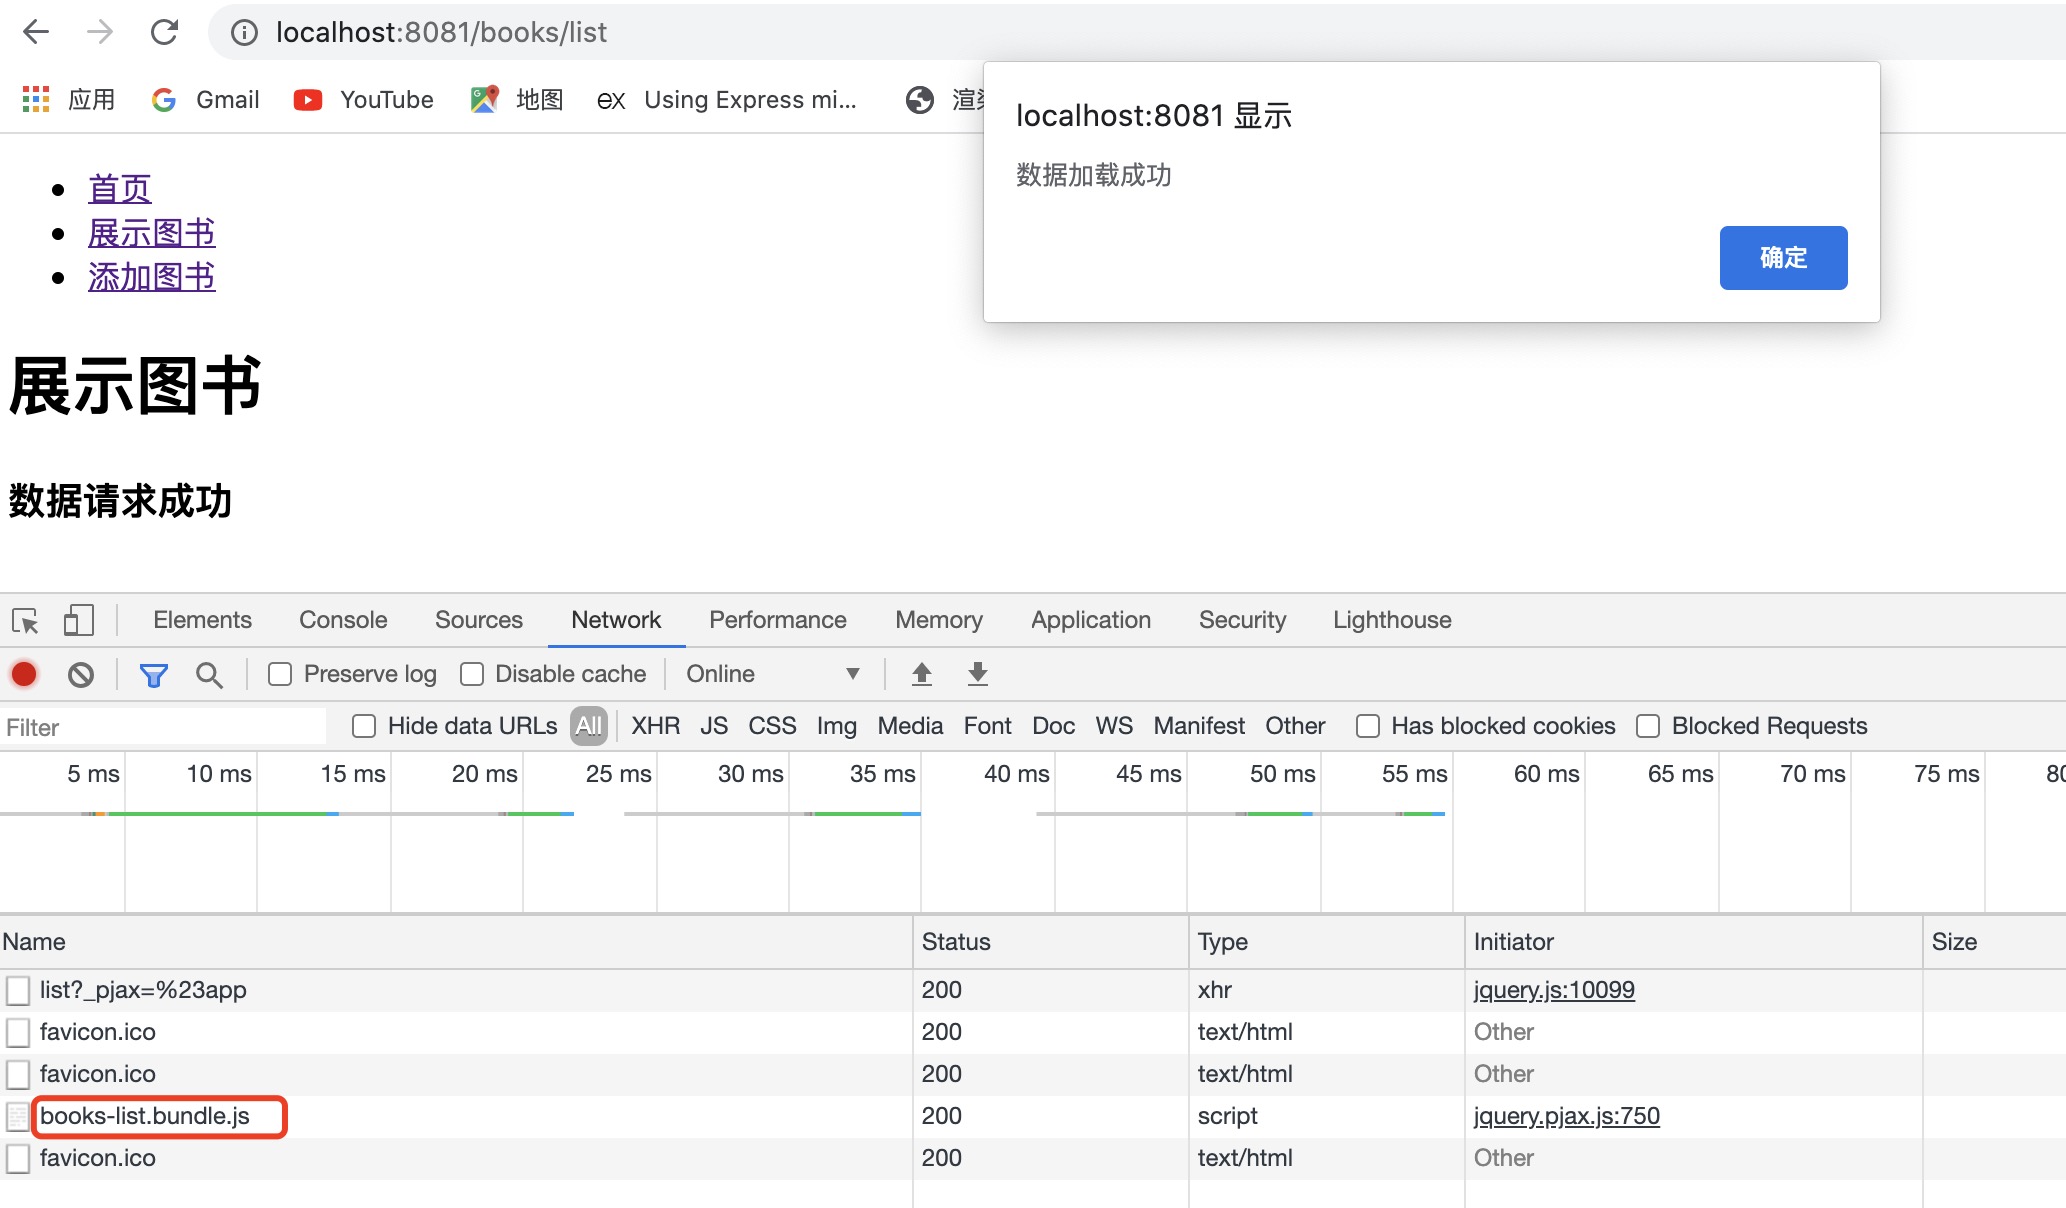
重新启动项目后,在浏览器中可以看到,当我们刷新页面的时候会加载一次资源,当从新建页点击跳转到列表页的时候,只加载了一个资源,不会重复加载公共的资源。
但是,这时候还有个问题,就是站内切的时候,组件的 js 文件会丢失。
比如现在我们需要用到 list.js。
const list = {
    init() {
        $('#js-btn').click(function() {
            alert('数据加载成功');
        })
        console.log('list');
    }
}

export default list;
2
3
4
5
6
7
8
9
10
<!-- /components/list/list.html -->
<div class="list pjaxcontent">
    <h1>展示图书</h1>
    <h3 id="js-btn">[[data]]</h3>
</div>
2
3
4
5
// books-list.entry.js
import banner from '@/components/banner/banner.js';
import list from '@/components/list/list.js';
banner.init();
list.init();
2
3
4
5
当我们刷新 list 页面的时候,点击会正常弹出弹窗。
但是,如果我们是从 create 页面跳转到 list 页面,此时点击就没反应了,因为 js 文件丢失了。
解决这个问题的方法如下:
- 首先,在 HtmlAfterPlugin.js 中给组件的 js 加上一个 lazyload-js 标记,表示有这个标记的 js 文件就是组件需要的 js 文件。
const assetsHelp = data => {
    let js = [];
    const getAssetsName = {
        js: item => `<script class="lazyload-js" src="${item}"></script>`
    }
    for (let jsItem of data.js) {
        js.push(getAssetsName.js(jsItem));
    }
    return { js };
}
2
3
4
5
6
7
8
9
10
- 然后,在 BooksController.js 中像获取 html 那样加一段获取 js 文件的。
$('.lazyload-js').each(function () {
    ctx.res.write(
        `<script class="lazyload-js" src="${$(this).attr('src')}"></script>`
    );
});
2
3
4
5
重新打包,然后在浏览器中访问就可以看到,站内切的时候组件自己的 js 文件也出来了,弹窗也能正常弹出来。
有的时候,如果是动态生成的 DOM,会遇到事件不好使的情况,此时可以用 jQuery.on (opens new window) 方法去解决。这样就不会出现事件不好使的问题了。
const list = {
    init() {
        $(document).on('click', '#js-btn', function() {
            alert('数据加载成功');
        });
        console.log('list');
    }
}

export default list;
2
3
4
5
6
7
8
9
10
Vue、React、Next.js、Nuxt.js 的渲染底层原理都是这样的。
